How to Create Videos for Your Business
Video is all the rage in marketing today. Think about how much time you spend on YouTube or other video sharing websites. People are visually stimulated which is why you hear the oft quoted phrase, "a picture is worth a thousand words."
While a picture may be worth a thousand words, videos will gain even more traction. When done right, videos will help you boost your traffic. To get them done right, this article will show you an easy way on how to create videos for your business.

NOTE: The owner of this website may receive commissions from purchases made via the links on this web page.
Creating videos used to be for the audio/visual geeks. They had the right equipment and knowhow. These days, though, you can create videos easily using online tools. Some of these tools have a steep learning curve. Others, though, are quite easy and require nothing more than a few words and a point-and-click interface.
If you're like me, you probably don't have several days to devote to video creation. That either leaves you having to spend thousands on a professional video creator or go it alone. But if you've ever attempted to create a video, you probably gave up due to the number of steps involved. It also takes a lot of practice.
Until now.
What if I told you there is a tool that all you need to do is enter the text for the video and an AI engine will take that text and create a professional-grade video? You'd probably look at me like I had two heads, or something.
I am going to show you two ways to create a video - the hard way first, and then the easy way. The hard way can be done with a tool you likely already have, or could easily obtain. The easy way will be practically push button success.
Why Video?
But first, let's explore why video is important for your online venture. The information in this post by Oberlo.com suggests that audiences want to see more videos. Not only that, they want to see videos on more platforms, like social media.
Video will be a de facto standard (if not already). That means if you aren't creating videos for your content, you're getting left in the dust. There simply is no choice but to get the production studio rolling. Otherwise, you can expect to hear CUT! from your audience. And there won't be any retakes, either.
Related: No Time to Watch Videos? You're Going to Love This!
What Should the Videos Be About?
You don't need to be a Hollywood producer to create videos for your business. It may help, but who has millions of dollars to shell out. The following are some videos that you can produce easily without help (or at low cost):
- Explainer Videos
- Cartoons
- Customer Testimonial Videos
- Unboxing Videos
- Tutorials
- Video FAQ
- Article Slides
- Roundups
- Interviews
- Product Demonstrations
- Web Series (Cooking, Sewing, etc)
- Talking Head Videos (quite common!)
The list only scratches the surface of the types of videos you can create. You are limited only by your imagination.
Be sure to make the videos relevant to the topic of your blog or wherever you plan on publishing/embedding the videos. Try to stay away from your cute cat videos unless your website is about cats!
It's not necessary to go over all the video types as several of them are likely too complicated to implement without professional tools or people. The whole point of this article is to show that it's possible to create videos witthout these complicated tools. However, a description of a few are prudent for this discussion:
Explainer Videos
These videos often contain cartoon-like elements and may or may not have animated characters. You'll see objects bounce in and out of the scene along with a narrator explaining the scenario depicted by those objects. This style of video is often used in advertising, but increasingly, it's being used for tutorials.
It takes a bit of practice to get the timing correct on these videos, and you'll probably need a post production editor to tweak it just right. However, with a little practice, you'll be a pro in no time.
Related: 8 Methods for Generating Ideas for Content
Cartoons
Animation tools like Powtoon are available to help you create cartoons. Other tools, like Cartoon Animator from Reallusion, have a steeper learning curve. Still, they can be used to produce sophisticated animated features for those willing to put in the practice of learning the tools.
Tutorials
The sky is the limit on creating video tutorials. You could use a talking head video, an animation or cartoon, or you could record your screen while talking (with the proper software).
I have seen tutorials created in almost all the formats available.
Talking Head Videos
Most devices today have video and audio capabilities. This makes it easy to record yourself on video talking about any topic imaginable. And if you have watched any videos lately, you'll see exactly what I am talking about. People can and do create videos on all kinds of topics.
Talking head videos are some of the most effective because the viewers see an actual person describing the topic. It brings an aire of authority to the video.
Many people are camera shy and don't want to to record themselves. That's okay as other video formats can be effective too.
Related: Do You Need to Be an Expert to Start a Blog?
Now, let's get to the business of create videos:
The Hard Way - PowerPoint
Many people are not aware that PowerPoint can be used to create rather sophisticated videos. Compared to other products, PowerPoint is relatively easy to create videos. The challenge with PowerPoint is that you have to find the assets required to produce your video. This is why it's labeled "The Hard Way" for this discussion.
The truth is, once you have gathered the appropriate assets for the video, compiling them into a cohesive video is simple. You add the assets in a logical way to a slide or series of slides in PowerPoint. Then, you add some animations (not always necessary), but can add a touch of professionalism when done right.
Once you have all the slides in the right order and the timing of the animations set, you can save the PowerPoint slide as a video and it will convert it for you. Pretty cool, eh?
Note - if you don't have PowerPoint, you can use Google Slides. If you have a Google account (Gmail), you have access to Google Slides. If not, simply signup, and you'll be good to go.
For this article, I'll use PowerPoint, but the dynamics will be similar in all slide software.
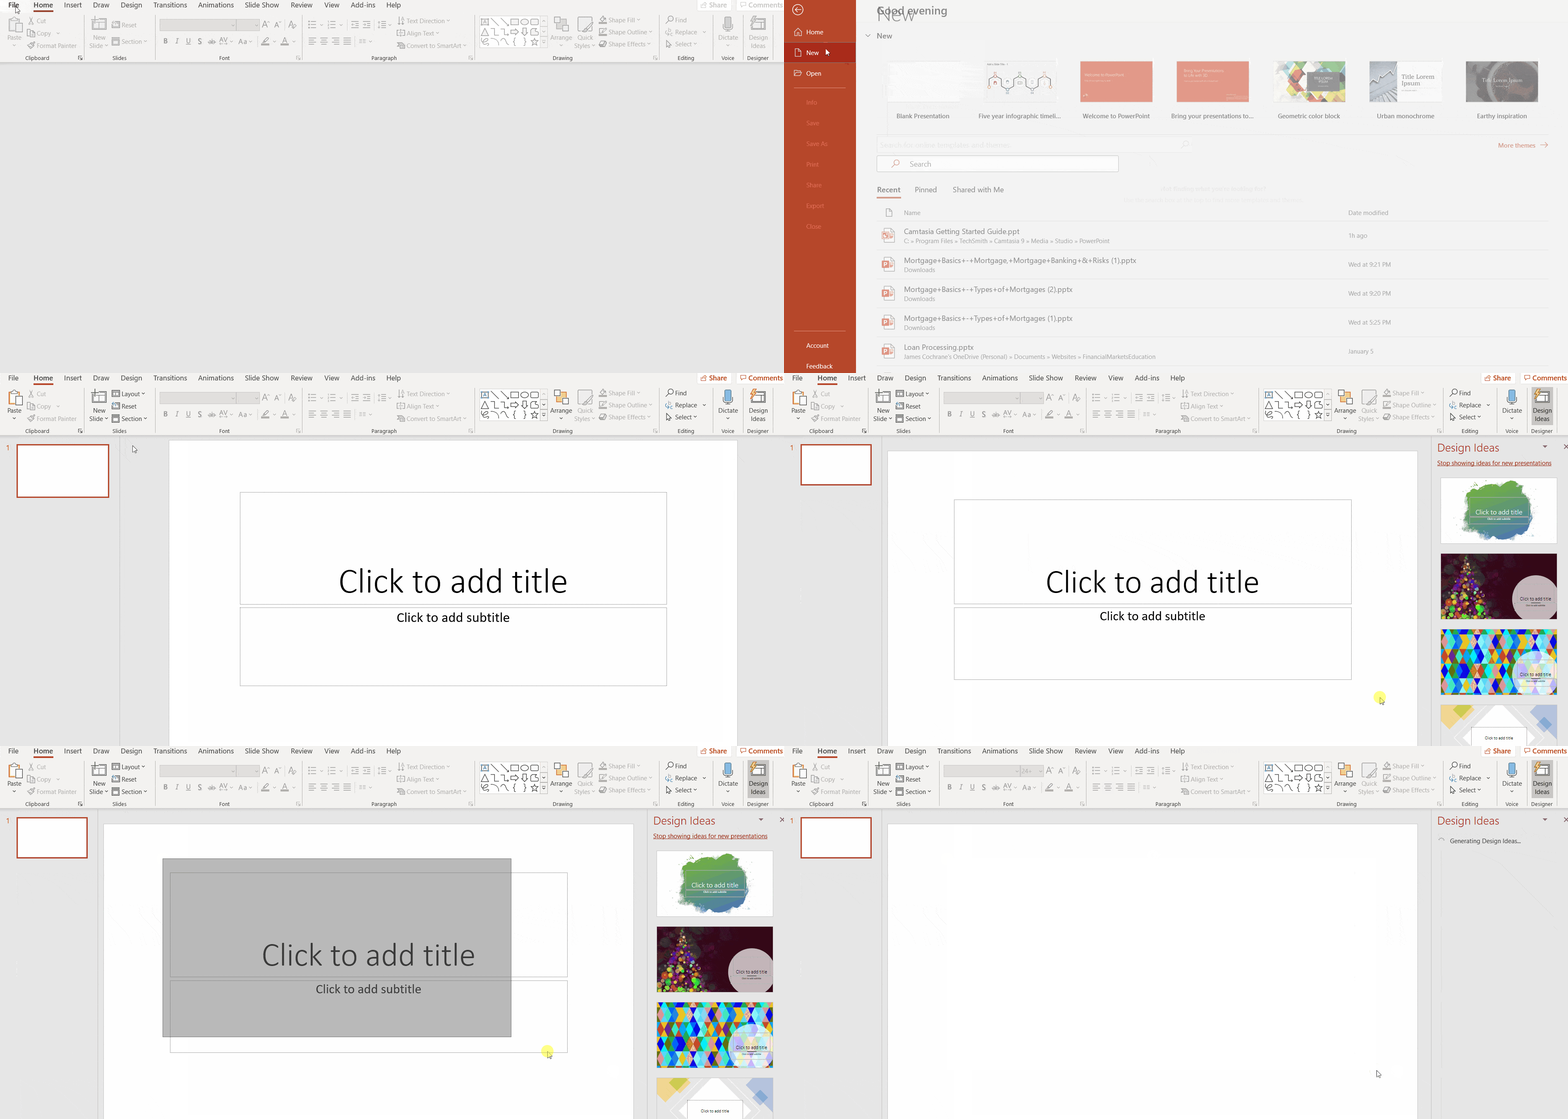
Step 1 - Create a New Blank Presentation & Remove the Template Objects
Create a new presentation (blank) in PowerPoint. Remove the default block of text/lines (Click to Add Title):
Step 2 - Find Assets that Match the Topic of Your Presentation
For this article, we'll add only a few slides to show how you would accomplish the task. In actual videos, you would likely have several more slides, depending on the message you are trying to get across.
Warning - be sure to use only assets that you have the rights to use. Many people seek images, audio/video and get hit with legal issues. Many websites that claim their assets are in the public domain are misleading. They don't check the rights of the assets loaded by their members. Check the terms of service before using any assets.
Note - the information in this website should not be misconstrued as legal advice. If you decide to obtain assets from any website, use them at your own risk. It is advisable to seek professional legal counsel before proceeding with your video creation.
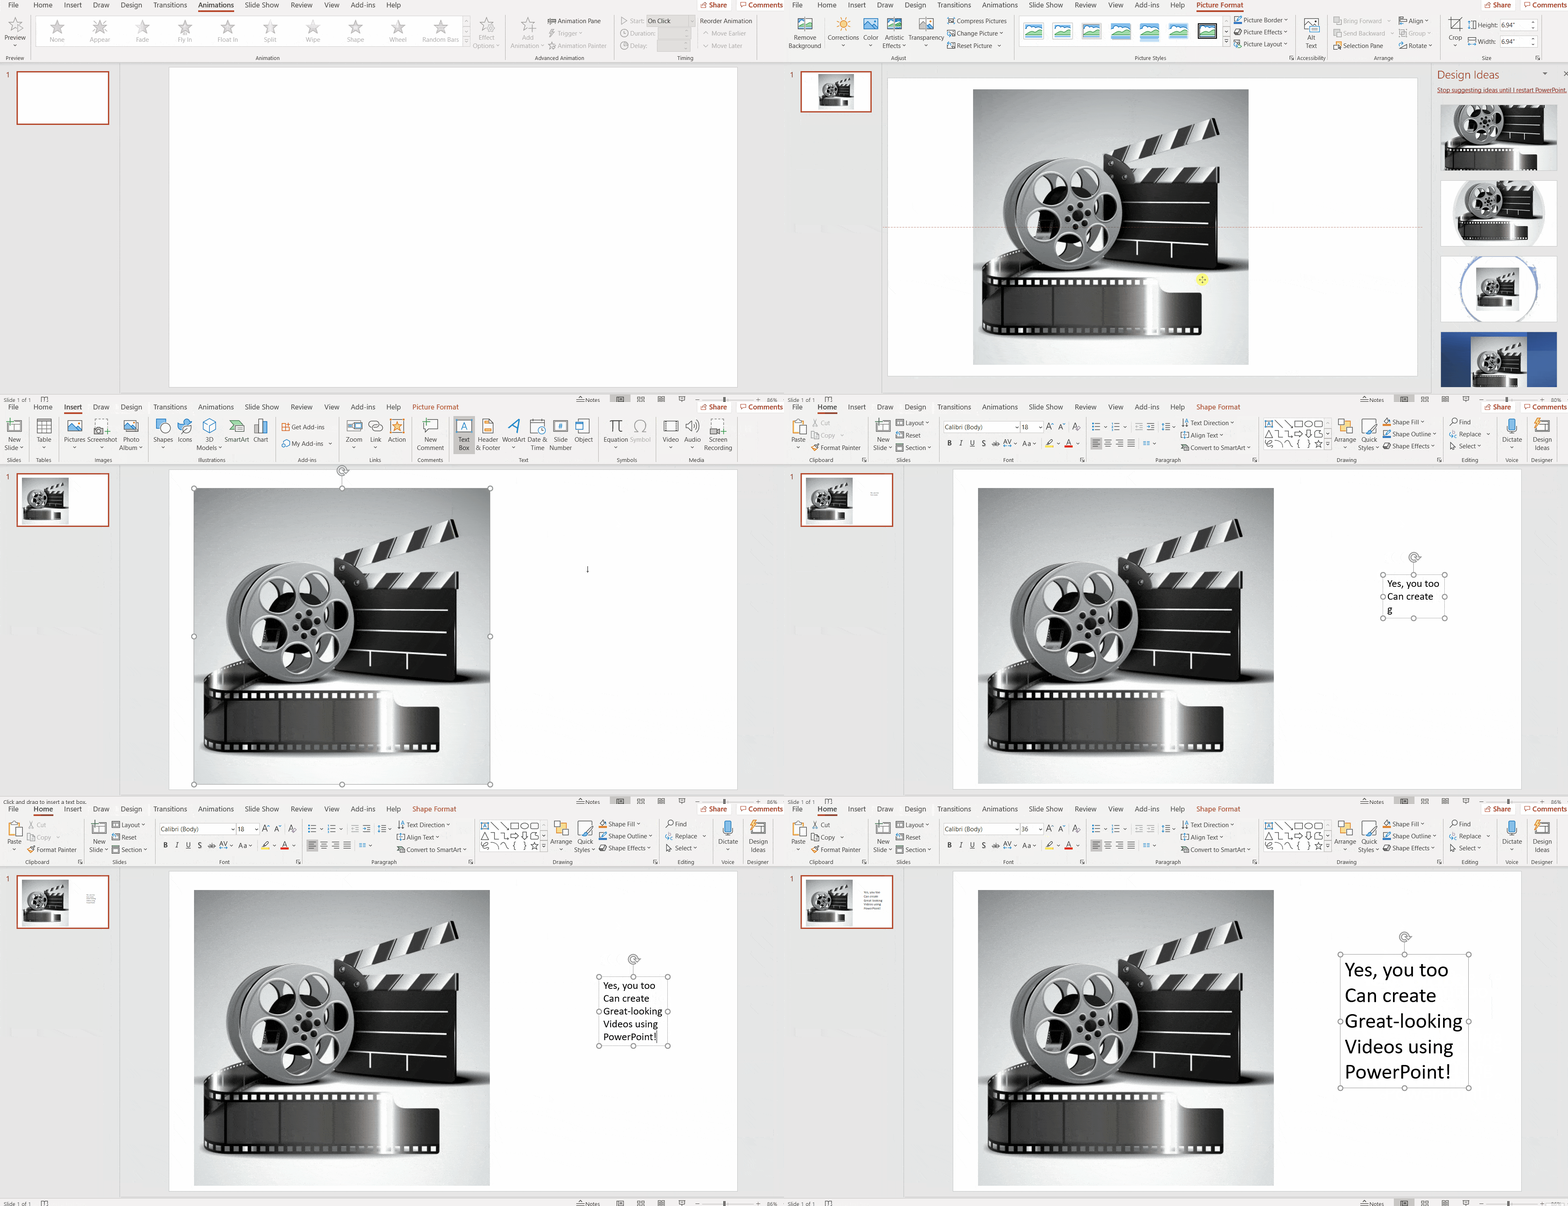
I have a license to StockUnlimited.com. I am not necessarily promoting them, but they have served me well. I found an image that is related to video production:

StockUnlimited.com contains an editing tool which is what I used to lower the resolution of the image. While it's nice that they make higher resolutions available (and sometimes it's needed), for most videos you can use a lower resolution which saves on memory.
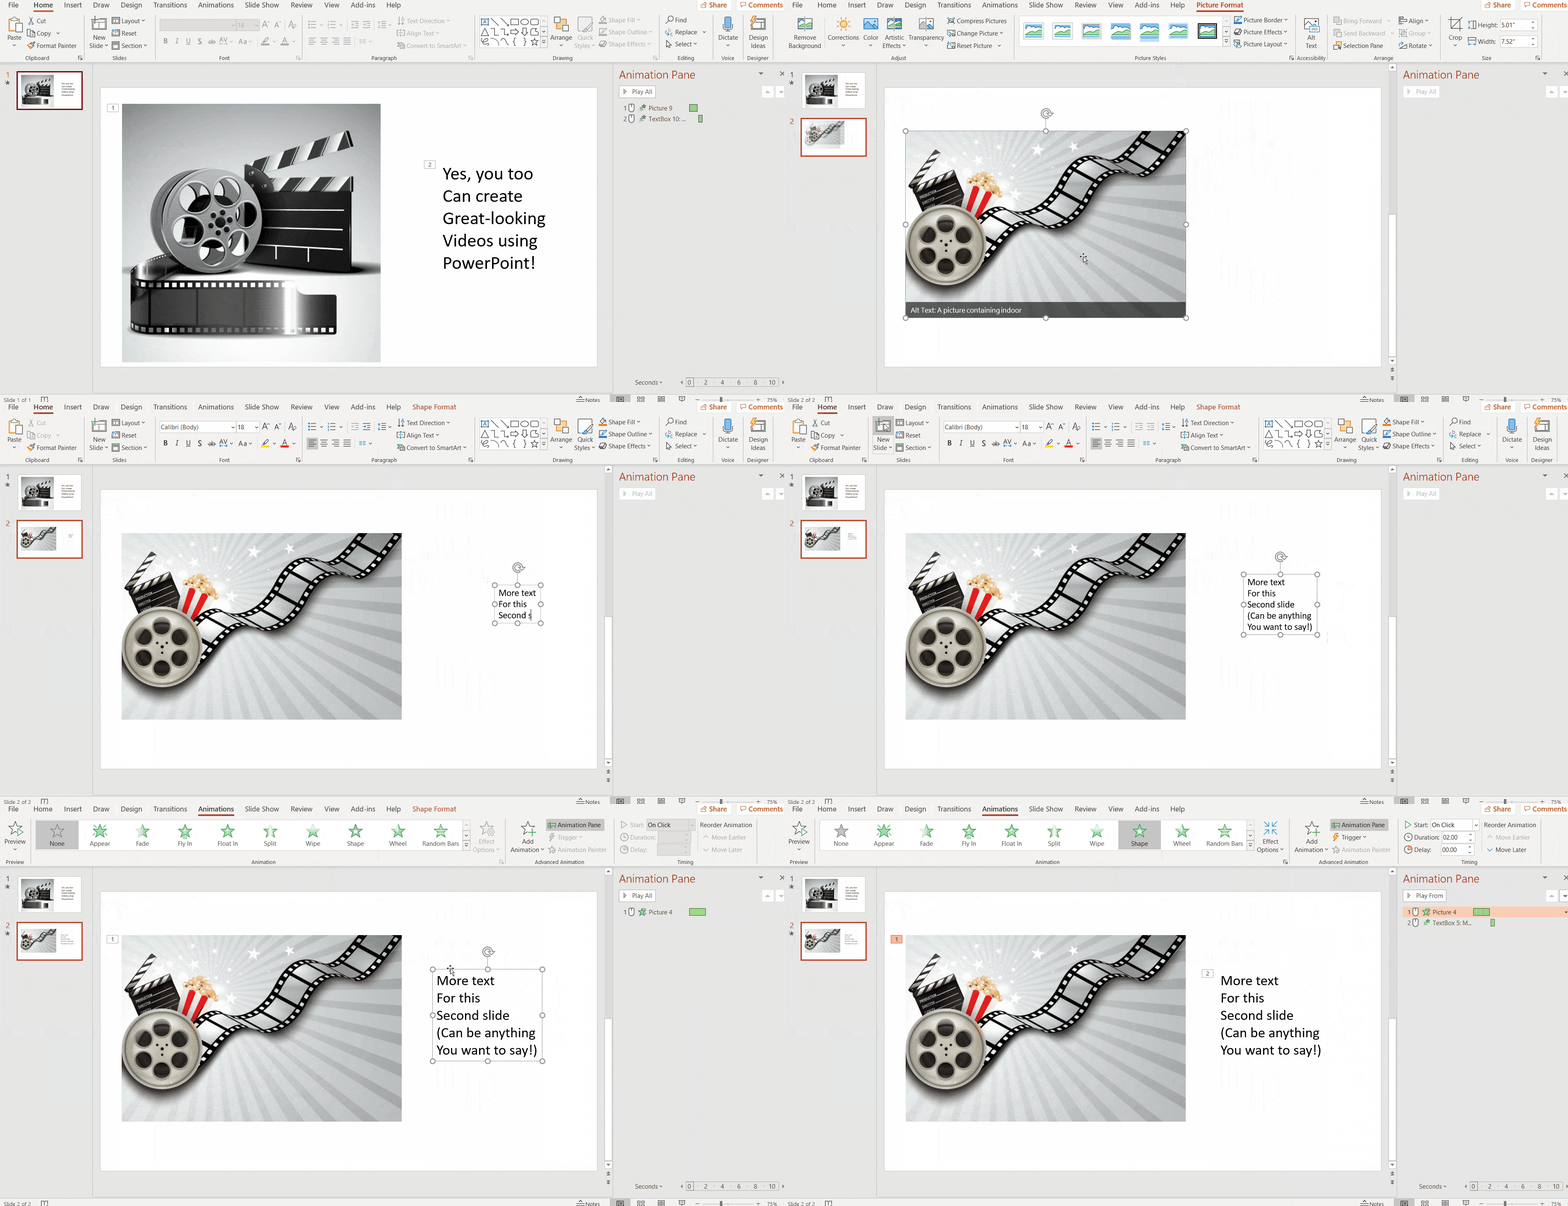
I found another video production file on the site. It will be the one used for the second slide.
Step 3 - Create the Slides and Add Animation
Now that we have our assets, we can add those images to slides on PowerPoint, one image for each slide. Then, we'll add some text to show how it can be animated.
This article is not meant to cover PowerPoint animation extensively. In fact, I will only show what is being done rather than how and why. It's not that animation in PowerPoint is complicated. However, it requires more information than we can provide in this article, which we'd end up going off topic.
The good news is there are plenty of tutorials available online, including on YouTube. You'll find plenty of resources to help you accomplish what you need with animations.
Another alternative is not to use any animations. Some people go hog wild when they learn about PowerPoint animations. When they do, it detracts from the message. Keep it simple and consistent.
First, add the image and the text as follows:
Next, we'll add some basic animations to both the image and the text. The animations chosen for this example may or may not be ones you choose during your video creation. They serve only to show how animations can be applied:
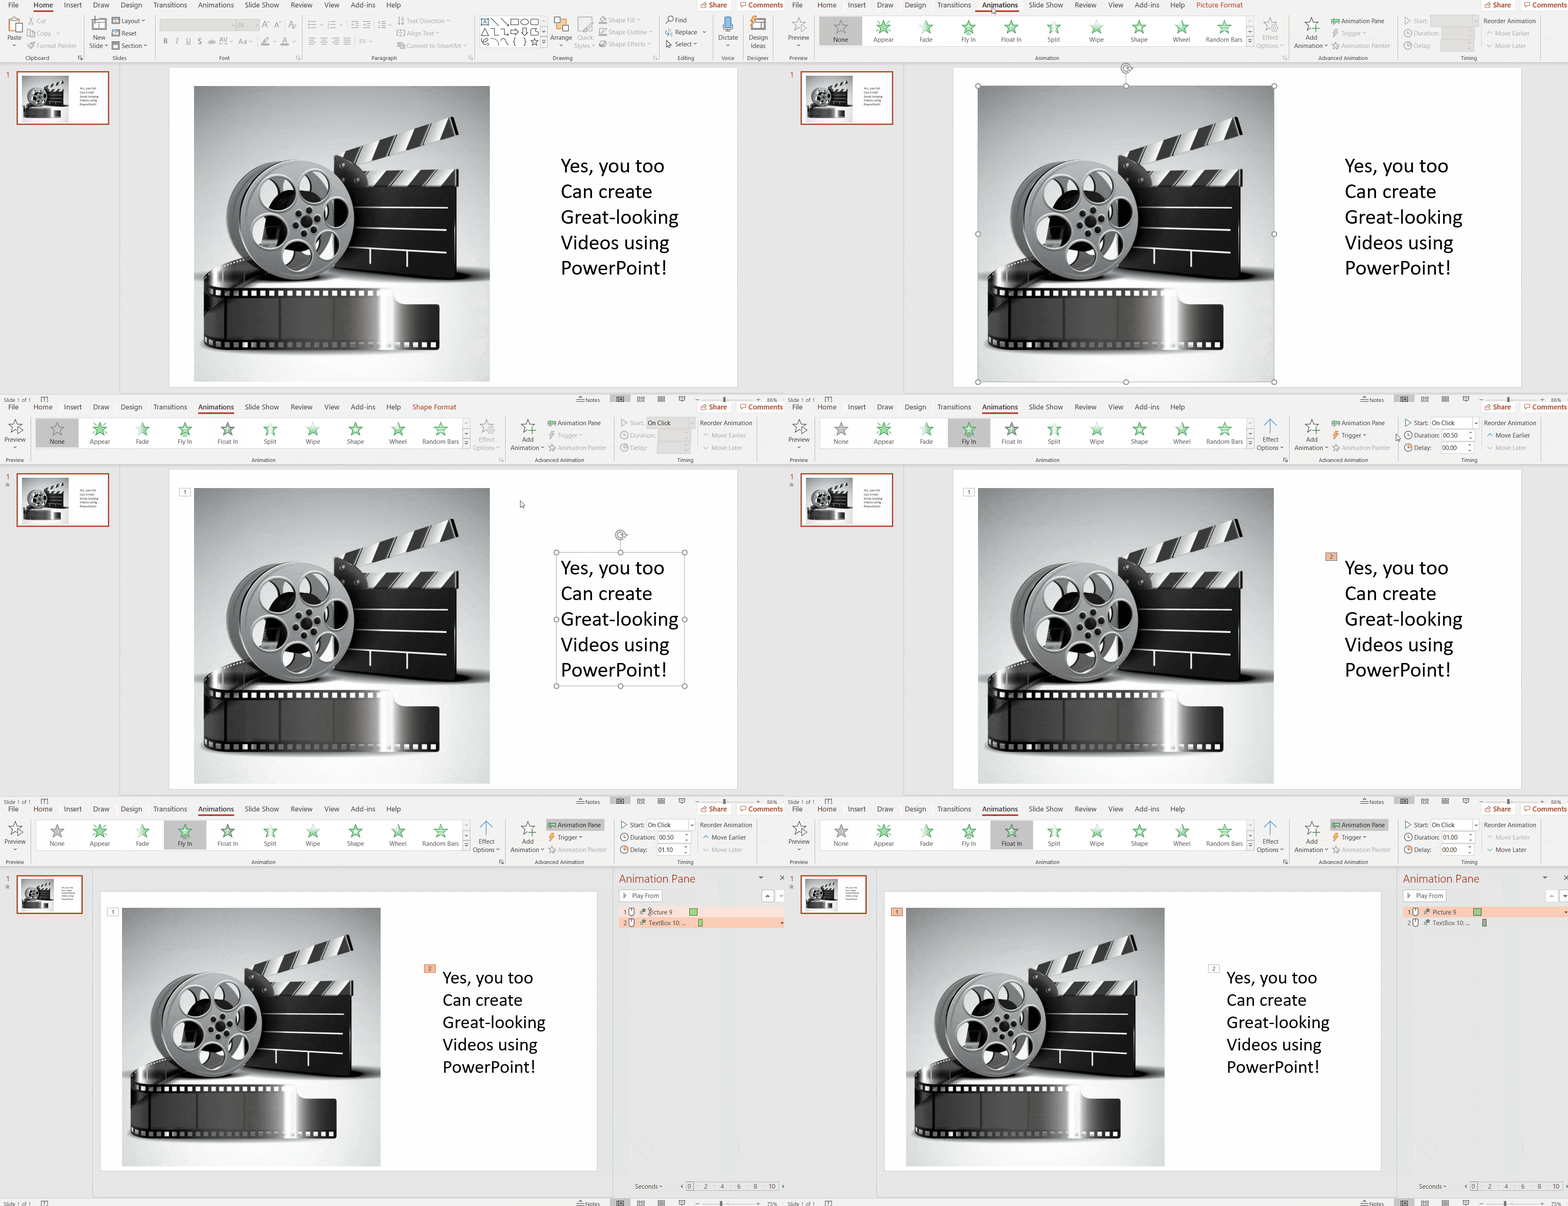
Nothing sophisticated with these animations, but useful for illustrating what's possible.
Step 4 - Create a New Slide
As mentioned, I have two images. Let's bring in the second one in a new slide. We'll also add text to this second slide and the animations for both:
Step 5 - Record the Video
We have accomplished what we set out to do - create two slides with animations. Next, it's time to save the entire presentation as a video file (MP4 is the format). It is a simple matter of saving it as a type other than a PowerPoint native format.
Many people know they can save PowerPoint files as PDFs. But they are usually unaware that MP4 is an option. It is.
As simple as this is, the devil is in the details. There are two ways to save presentations as videos in PowerPoint. When you use the Save As option, you are not given any options for timing between slides. PowerPoint will save with whatever timings it feels is correct.
To alter the timings of the video, you'll need to use the Export feature.
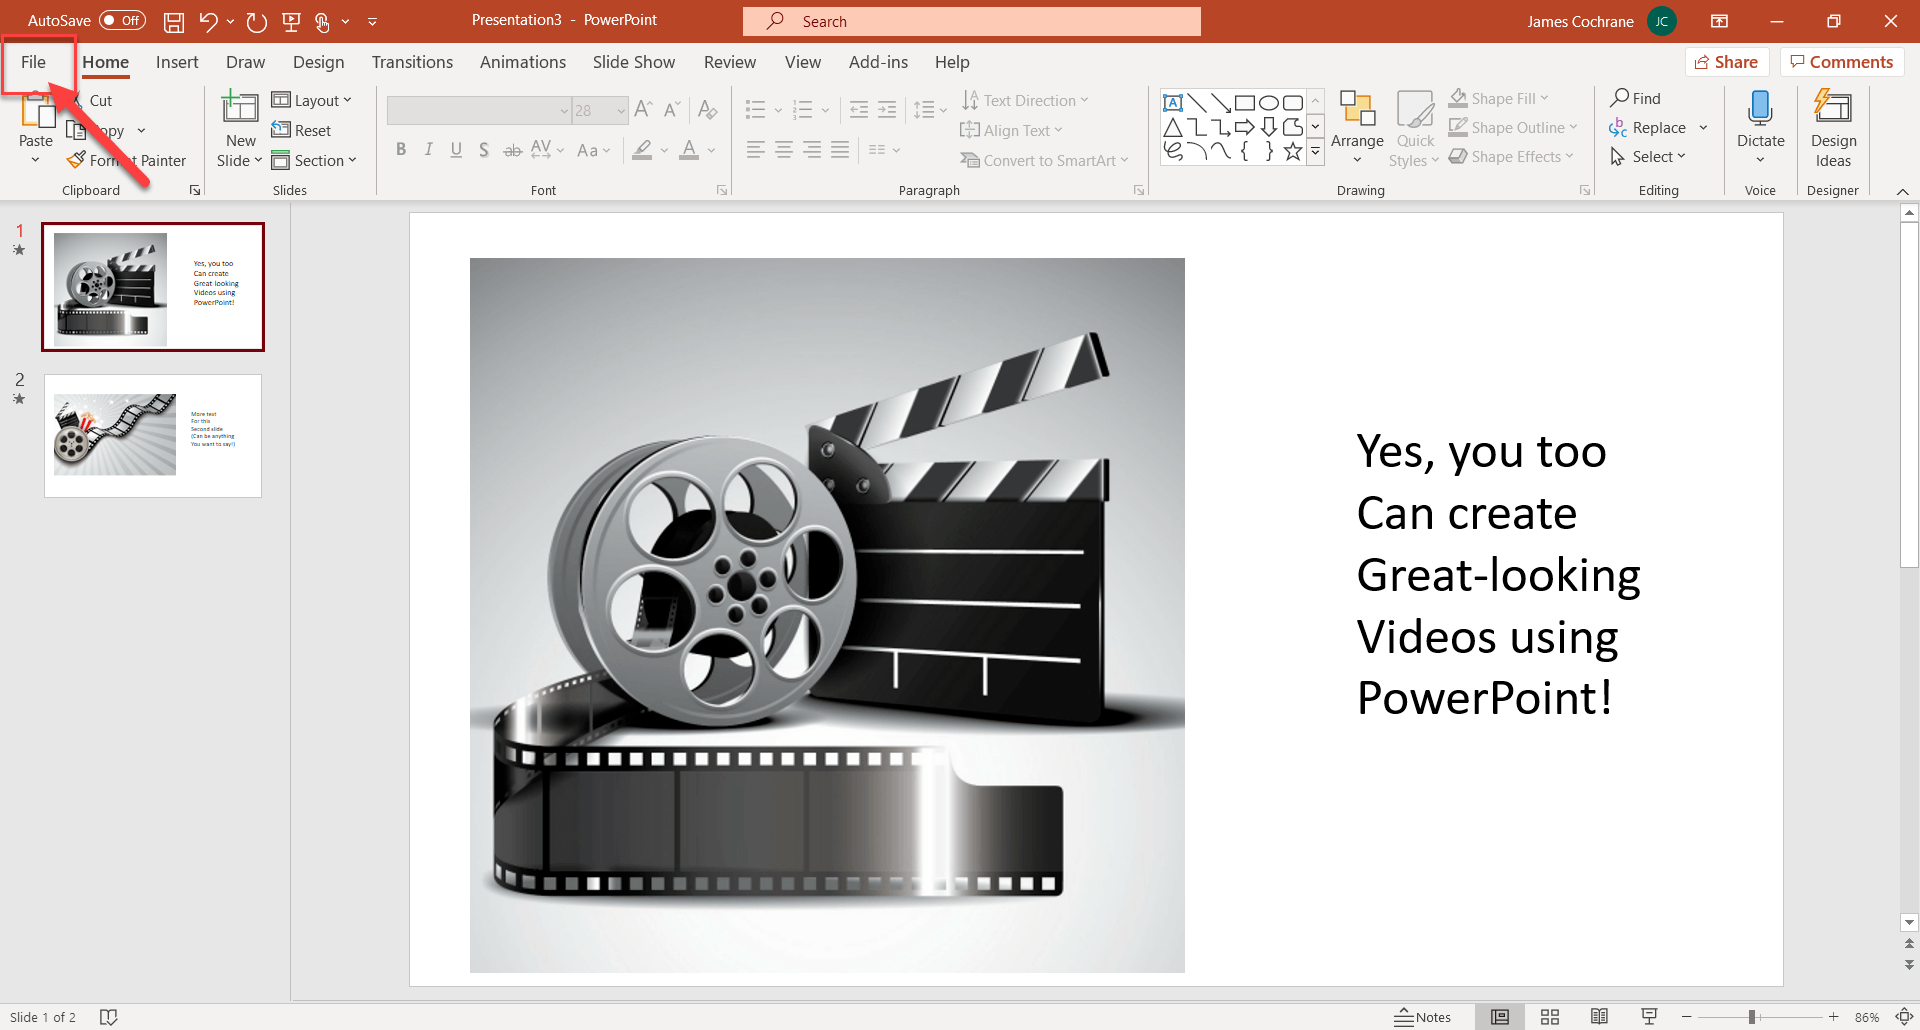
For this step, use the Export feature. Select File as shown:
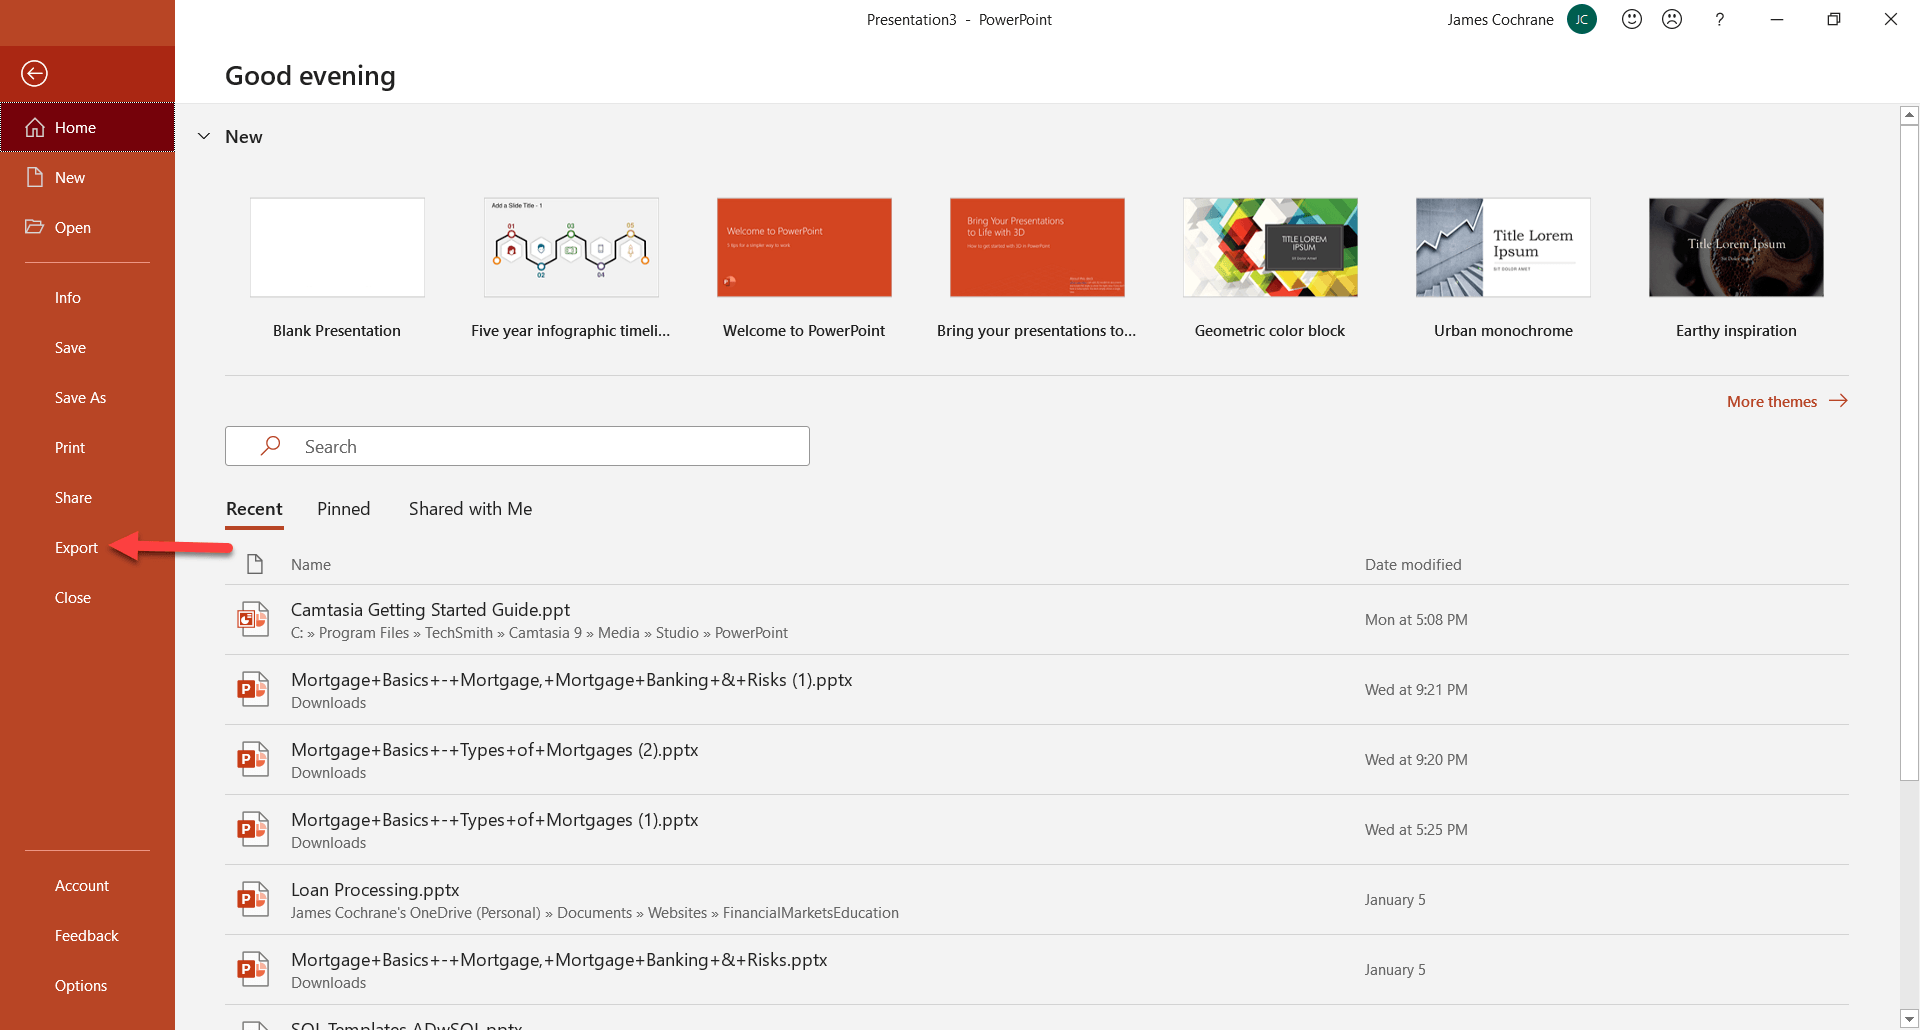
Then, click on the Export menu item:
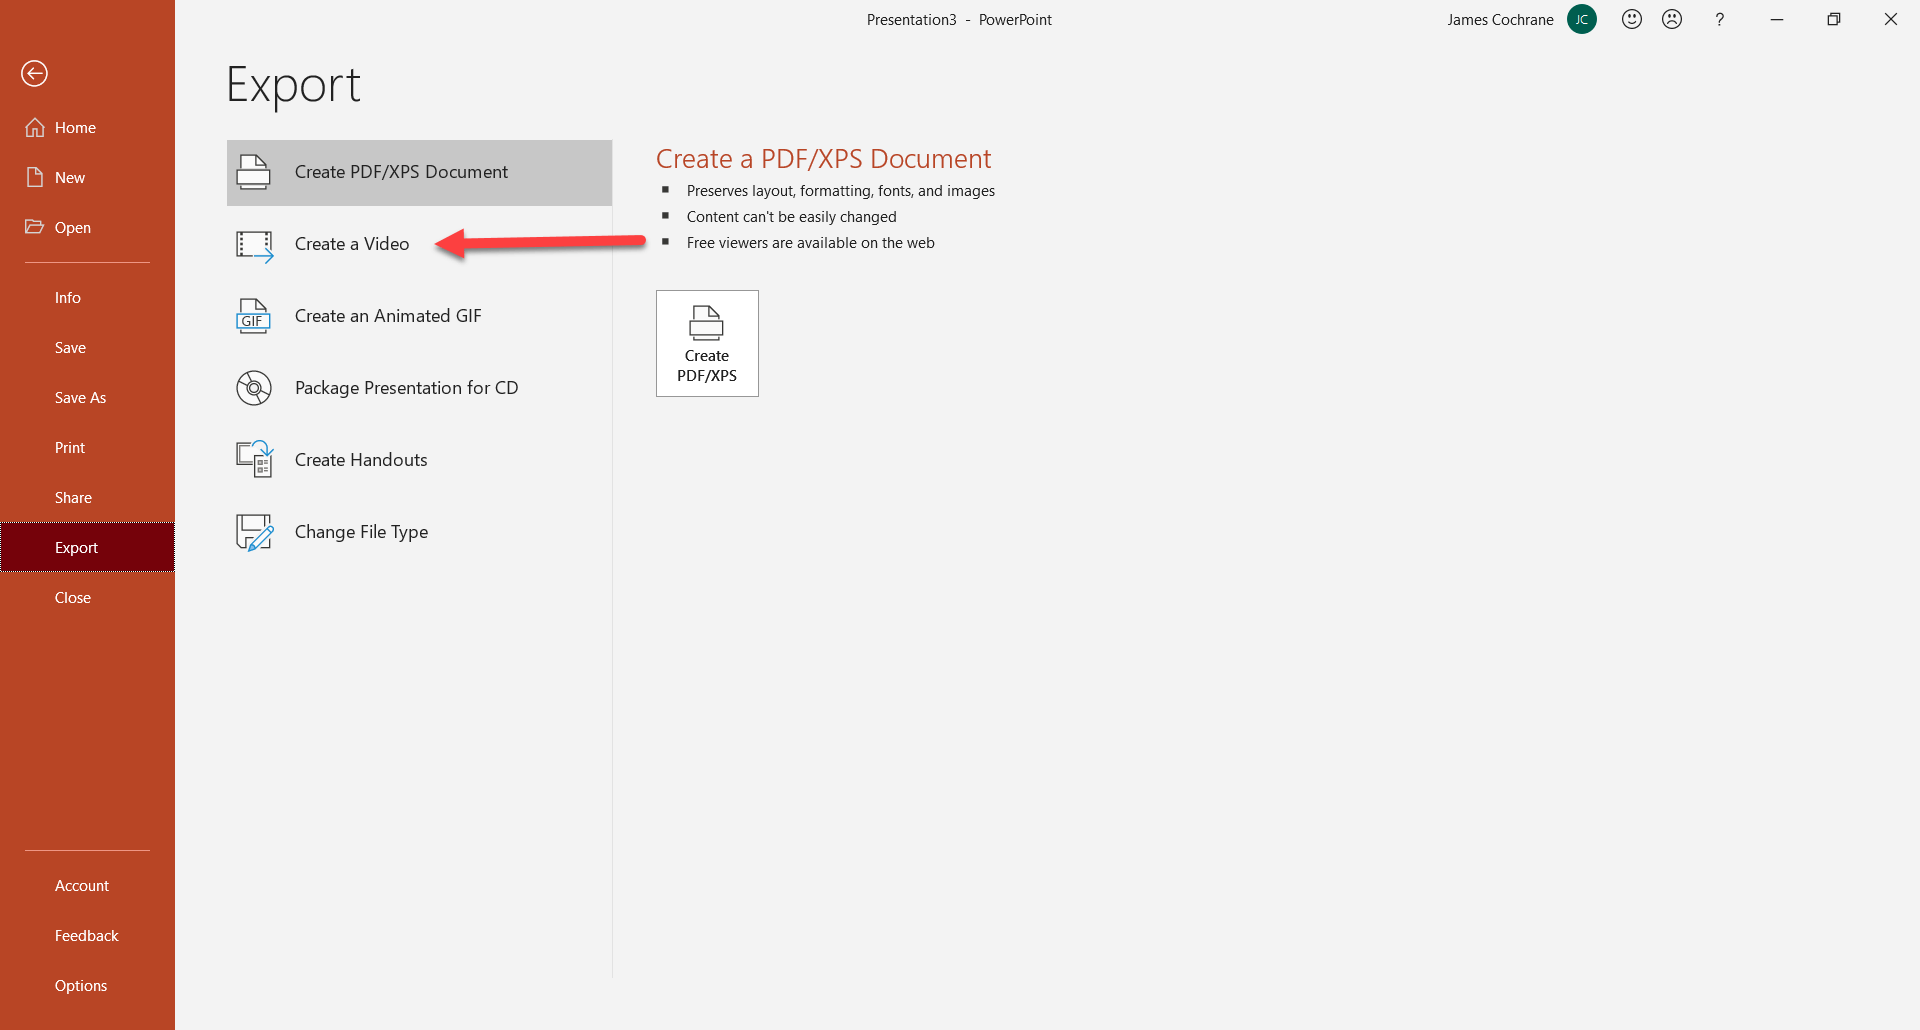
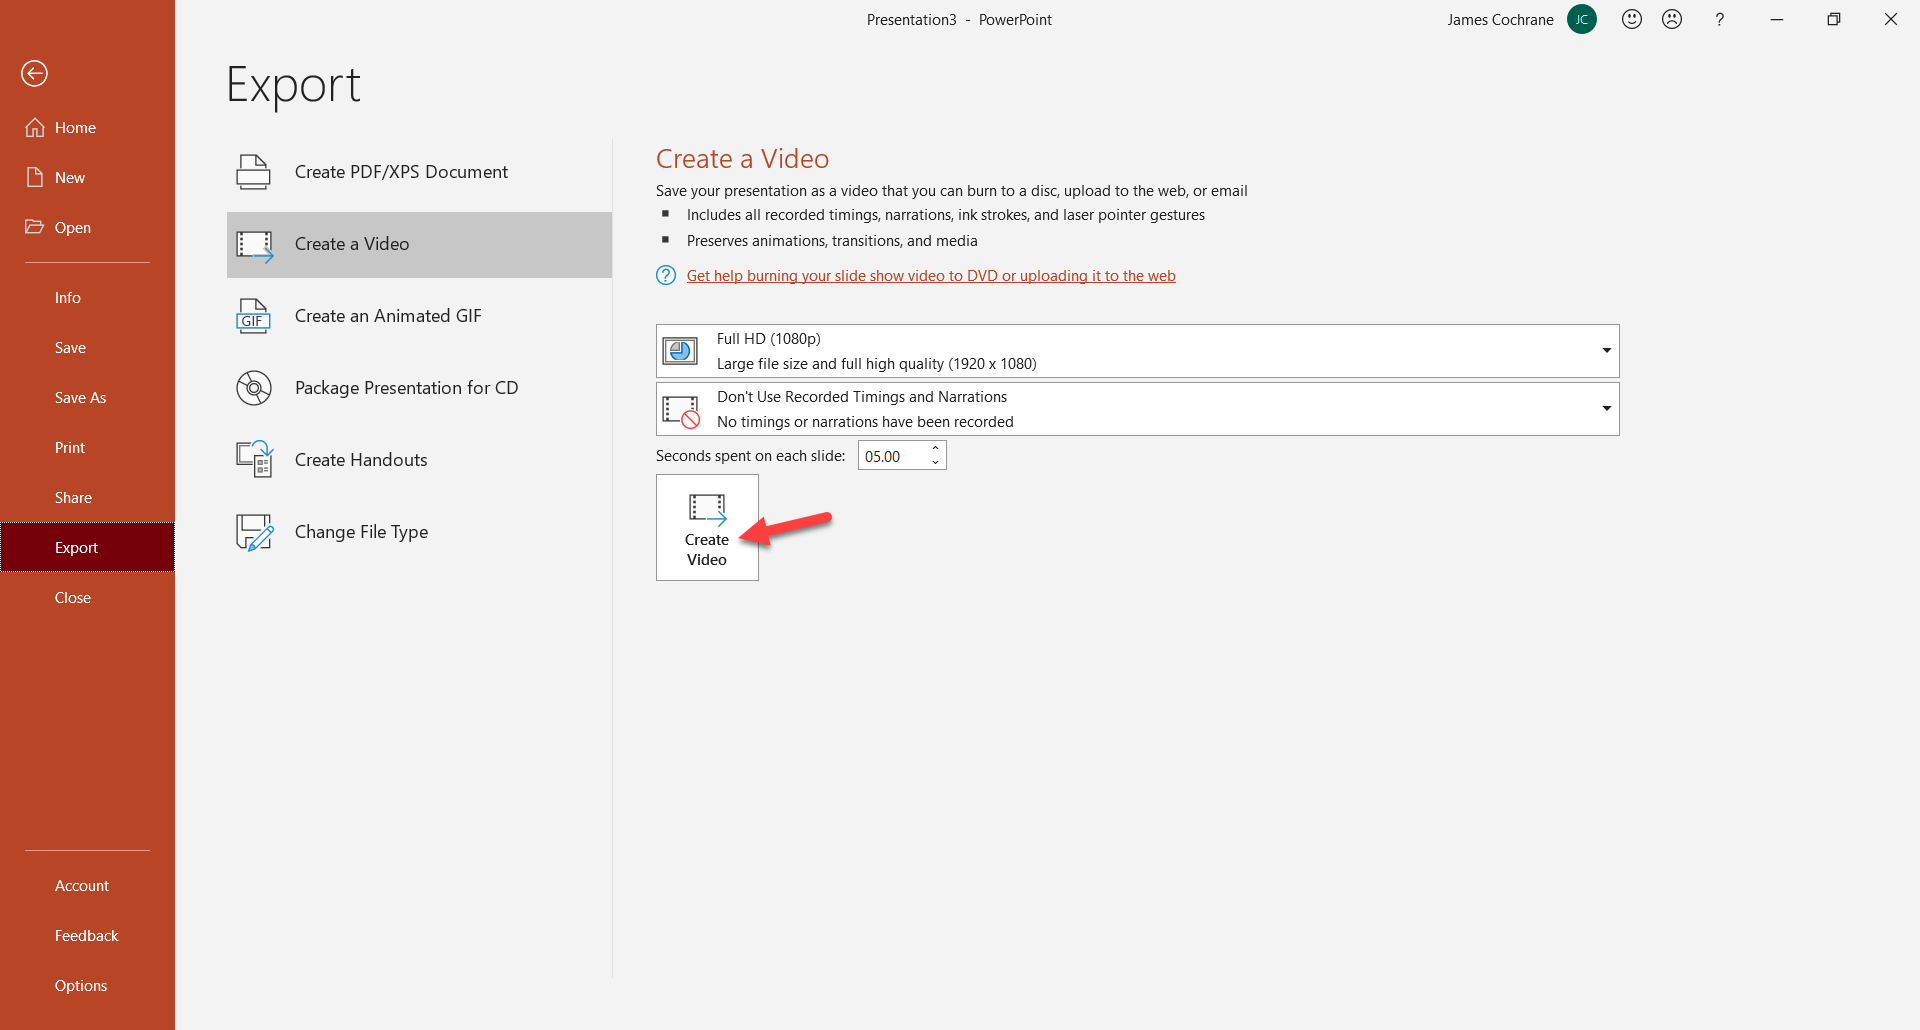
Select the option for "Create a Video":
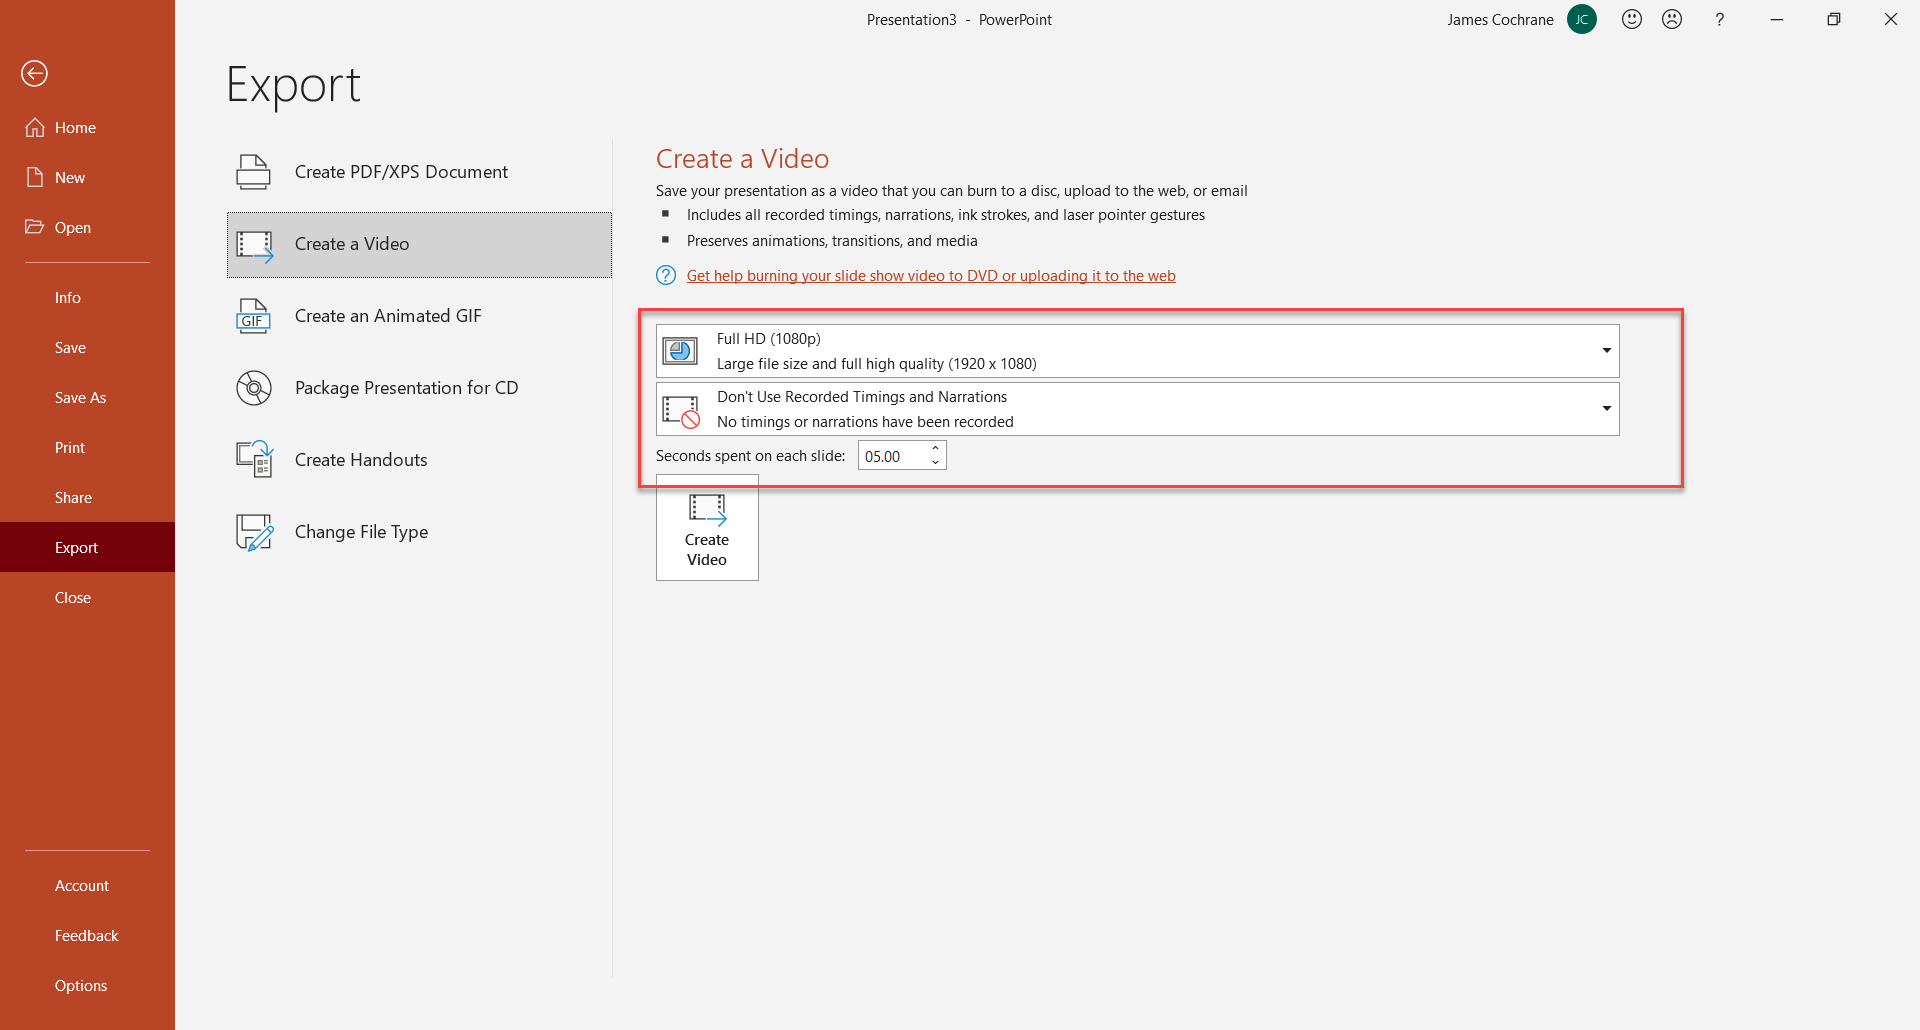
We'll stick with the defaults. But as you can see, you have choices on how to control the timing of the slides:
When you click on the Create Video button, that will begin the process of saving the video as an MP4:
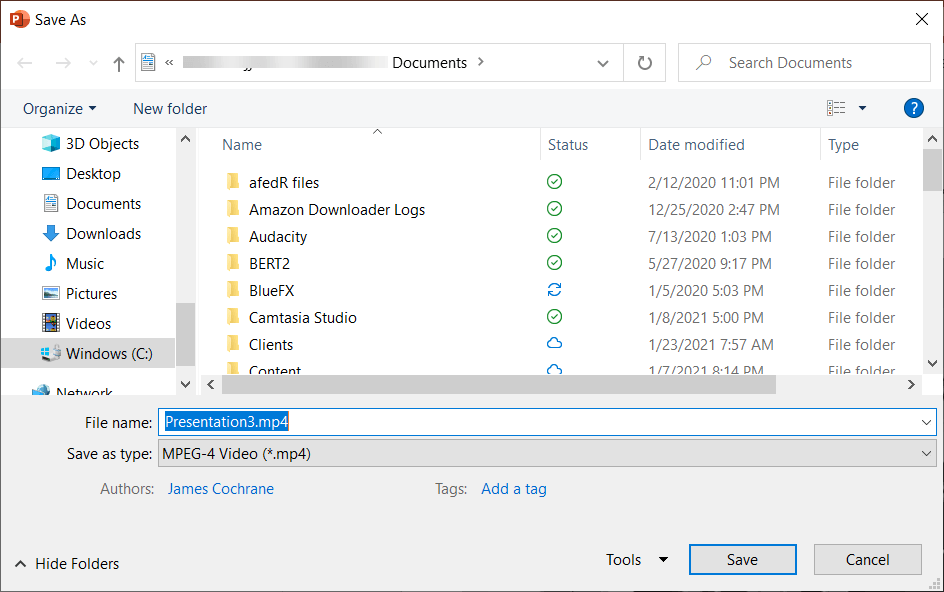
Name the file whatever you like and save it to a folder that you'll remember where it is. For this, I'll leave the default name:
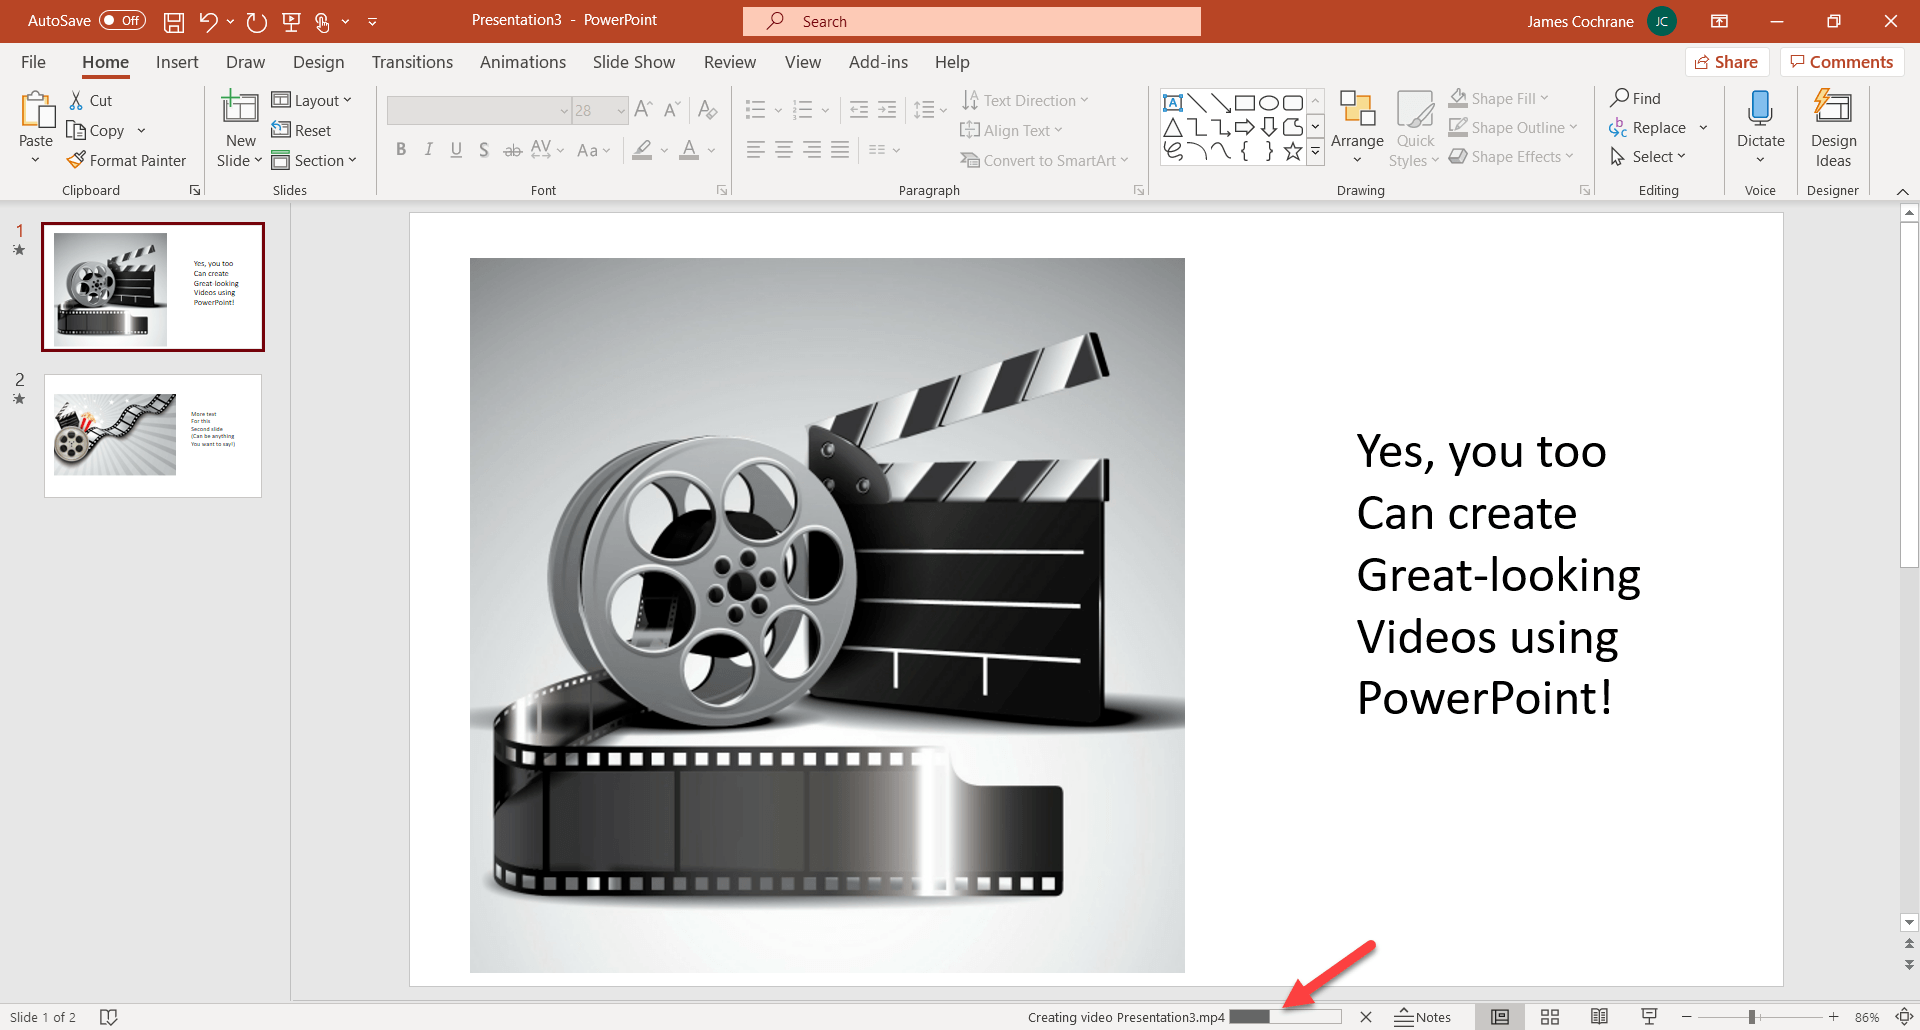
Depending on the size of the presentation (this one is small) the process could take a couple of minutes to save to a video format. You'll see a progress bar as shown with the red arrow below:
Once the process completes, you'll have a new MP4 video file. You can upload the file to YouTube or any other place where you want the video to be played.
